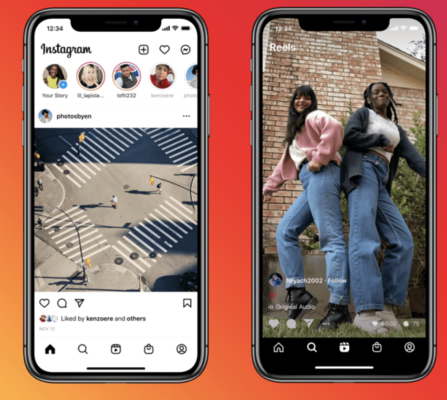
TikTok started the trend of short-form video content to engage more users on its social media platform. Following their footsteps, Instagram started ‘Reels’ in 2019 with the same concept.
TikTok got banned in some countries for various reasons, which became an advantage for Instagram Reels to shine. This feature by Instagram is now even more popular than TikTok.
People are becoming influencers, promoting their brands, and gaining popularity through Reels. Today, people even believe they can buy Reels views via PayPal and grow in popularity. But success over Instagram depends highly on your organic efforts.
So, if you are new to Instagram and Reels, let’s walk you through the initial steps of making an attention-grabbing reel.
Steps to Make Your First Instagram Reel
If you are not a celebrity actor, sportsman, or pop star, it will take time for your Reel to spike up the charts, gain popularity among millions of users, and get verified on Instagram. One step at a time!
The first thing you should think of achieving with your videos is to get the attention of your followers. If they like it, they will share it. And the more people see your videos, the better your chances of going viral.
Let the known people appreciate you first. In this way, you will be aware of what more needs to be done to make an impact on your audience.
To help you understand the power of Instagram Reels, you must know that brands today receive an even higher engagement rate on Instagram Reels than on TikTok. The difference is almost around 387,000 likes or more.
Whether you are a brand or an individual, if your reels are worth the show, people will get to see them, and you will go viral. So, let’s begin with the beginner steps to make a reel:
Step 1: Find the ‘+’ Plus Icon
You don’t have to go on an adventure to find it. You will see the ‘+’ tab on the top right corner of the page.
Click on it, and select ‘Reel’. You will land on the page that automatically opens up your rear camera.
When you are an expert on Instagram, you will realize that you can access this page by swiping left on Instagram’s News Feed. And then, you have to select the option ‘Reel’ from the available options below.
Step 2: Record or Upload your Video
You have two options for creating and posting your Reel. You can upload a video you just created and save it on your device. Or, you can record one directly from the application.
If you are recording a Reel, you can shoot just one clip or a series of clips to blend it into one.
You can also record hands-free by turning the timer on in the recorder section. You can then take your position for the act while the recording starts after the timer is out.
You can tap the ‘record’ button when one clip is done to end the recording. And then tap it again to record another clip. Do it for as many clips as you want to record.
You will get an ‘Align’ tab, which will be helpful for you to line up all the objects from your last clip before moving on to the next. You all have seen transition videos, right?
So, this ‘Align’ feature will help you create Reels with smooth transitions where you change outfits, add friends to the video, add new music, or others.
Go to ‘Edit clips’, to watch, trim or delete the clips you just recorded. Finalize the order, and then move on to the next step.
Step 3: Do Your Edits Right

After the recording part is done, you can add drawings, stickers, or any text to your Reel. You have plenty of icons on the top part of Instagram’s editor.
You will need some time to get used to these creative editing tools. But once you get a hold of them, your Reels will look astoundingly perfect.
The only way to master them is to keep practicing!
Here is a glimpse of what you can do with the default editor of Instagram in its Reel section:
- You can add your audio from the device or use one from the Instagram library.
- You can choose the length of your Reel to make it 15,30,60, or 90 seconds long.
- You can change the speed of your video and set it to .3x, .5x, 2x, 3x, or 4x.
- You can adjust the layout to add more than one recording to the frame.
- You can record your videos with both your front and rear camera at the same time through the ‘Dual’ option.
Add trending music mandatorily to ensure that your Reel gets ample views. After the edits, you can download a copy to your device, but the audio won’t be saved.
Step 4: Post It
Add a caption, tag people, edit the cover, add location, rename the audio, and change other preferable settings before you go ahead and post it by clicking on the ‘Share’ button.
Conclusion
Congratulations, you have entered the Reel world. Now, the next important thing is to learn the hashtag game and the use of hacks. They will help you boost the visibility of your Reels. Our other Instagram guides will help you learn the tips and tricks to scale up your followers and gain popularity organically.

Read next
How Do You Start A Podcast On Spotify?
Mar
How to Delete TikTok Profile Picture?
Mar
How Much Does Instagram Pay For 1 Million Views?
Mar